Monday, December 26, 2011

Insperation

In this post I will start posting inspirational pictures of attic and other related rooms/diy/products etc. Here are some beautiful attics to be inspired by. Here is a mix of some:


In both attics you can see that the decorator worked WITH the vaulted ceilings as they are an architectural element. The extensive use of white adds to the light and airy feelings in both rooms. Also, by using the with as a backdrop, the rest of the colors do not overwhelm.

My plan was to use the same colors I already used in the rest of our home in the attic also. This way the attic will be connected visually to the rest of the house. The colors I used were white and different shades of beige's and desert colors. My plan was to add other colors as accents in furniture and accessories so the space will not be boring. The next picture actually has the basic color scheme I want for the attic.


This picture is not really of an attic but one can take ideas and be inspired by it. Isn't it amazing?


Here one can see a great use of space. The bed is built as a loft. That gives some separation between different areas of the attic and some privacy too. This way when you eat or lounge you do not feel as if you are in a bedroom.


Sunday, December 18, 2011

Mudding

Well after two months of studding and hanging the drywall it was time to mud the drywall.

The most impotent thing in mudding is patience.
The basic method consists of applying a strip of mash type or paper tape with some mud over the seams between the drywall sheets. After that dries two more coats of mud are added. Then comes sanding. Everyone hate this part. It is dirty and messy. I was told by many that only professionals can do a good job mudding. Since bad mudding shows - that's a problem. As I stated before - I am not a pro at this. So I went to work.


I found that if you smooth the mud in Every layer with the trowel that is used for applying the mud to the drywall - you do not have a lot of sanding to do. This is the key to smooth surface. Careful mudding and smoothing as you go. And no - you really do not have to be a pro at this. All you need is patience. Again - the most dangerous part here is the risk of falling of the ladder. So be careful. Another thing - there are different tools made for applying the mud. I found that since I have a small hand the most comfortable tool for me was a 6" trowel and nothing eider then that. Try and see for yourself.

By the way, one of the most important things you need for any renovation is plenty of old cloths you can where and destroy in the process.


The mudding took me three more weeks. This is how it looked during and after it was done.

The dormer:


As you can see in the pictures, for the outside corners I used metal that protects them before mudding. For the inside corners I used stripes of metal that are attached to paper.


Mudding takes time and mostly patience. That's all. Since I took my time and smoothed the mud as I applied it, I only needed light sanding. 
Drywall

I was told by many people that drywall is a job that should be done by professionals. Well... maybe. Maybe not. It is not nuclear science. Really. Two issues I had to deal with regarding dry wall were:
One - how to get 50 sheets into the attic (each is 4X8sf.)
Two - how to hang it alone, especially on the 12 ft high ceiling.

I compared the prices and shipping in a few home improvement stores and a few private stores. At the end I bought the drywall at Lumbar 84. The plan was that they will deliver the sheets on a track that have a crane and that they will get the drywall into the attic threw the attic window. Good plan isn't it?

In reality, when the truck got here, it could not get close enough to the house to do that. So the driver downloaded all he drywall to our parking space. Oh well.

Since each sheet is very heave I cut all of them either to a prices size or by half and my husband and I howled all the pieces to the attic. Not fun at all.

And now to hanging all these sheets. Since you need at least three people to hang drywall (two hold it and one screws it to the studs it was clear that I have a problem here. And evan if I had some assistance, we would not be able to hang the drywall on the top ceiling.  So I bought a drywall lift. You can rent one in True Value etc. I decided to bay one since I knew it would take me at least a few weeks to finish hanging all the sheet and it was cheaper to bay one then to rent one. I bought mind on EBAY for 150$. It was worth every cent. The lift holds the sheet tight to the wall/ceiling and allows one person (big/small/short/tall) to hang it alone. It also reached the highest point of the ceiling so all I had to do is to set a ladder close, climb on it and screw the drywall to the ceiling studs. The most difficult part in this process was to make sure I will not fall of the ladder.


In the picture avove you can see the built-in shelves I added in the dormer.


 You can see here the drywall lift - my new BFF.


And the drywall was hang. It took me a few weeks to complete hanging it. But I did that.

Lets start

So now, where to start?
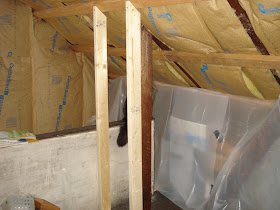
I cleaned the attic and stored all we had there under the eves. I covered all of the stuff I had stored with plastic to keep it from the dust.

Then I decided to do a Small part of the attic as a "pilot" and test my abilities on this small space. I studded the wall and drywalled it. Then I found that the wall was not leveled. So...... I took it apart and re-did it (all in all three times until I got a leveled wall. It's a good thing that it was a small wall). This try and error process taught me how to stud and hang drywall. The impotent thing is make sure you place the studs 16" (om center) of each other - this will be helpful when you hang the drywall later on. At this point I also added built-in shelves on one of the walls.


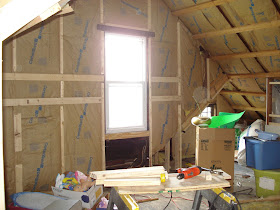
And then I studded the whole space. It took about 100 2X4 studs (about 300$ including screws and nails). I also studded the ceiling so the drywall would have something to cling to.


The dormer:


The northern side of the attic:


Middle of the room with the chimney:


Then I decided where I would like the electricity to be and I "planted" plastic tunnels that later the electrician could use for the electric wires. This way he would not have to destroy the drywall.
At this point all the tools I needed and used were circular saw, measuring tape, hammer and a drill. And after a few weeks - the attic was studded. Yeehaa.

Saturday, December 17, 2011

Srarting point

Hello - this is my first post. Welcome.


Three years ago my family bought an 100 years old brick home in rural U.S.A. It was old. It felt old. But we fell in love with its character. The bricks, moldings etc. It was the first time we owned a home.


We did a few remodeling projects in the house in the last three years. I will describe them in the future.

The biggest house renovation project we wanted to encounter was renovating the bare attic. I asked around and got estimates from contractors that were around 20,000 $ - 30,000 $. Since we do not have this kind of money we thought at first that we will have to leave the attic as is and use It for storage only. But about a year ago I started playing with the idea of doing it myself. I made a rough estimate that doing it myself will cut the renovation cost by 90% to about 3,000 $. Another plus by doing it yourself (beside the pride you get etc.) is that the cost is gradual since you can control it.
When I found myself last April unemployed I decided to renovate -or in other words built the attic from almost scratch with my own tow hands. And so I did. Here is how I did that.

here are some some pictures of the attic before:

The main space:


The northern corner with the future reading nook:


The dormer:


the future reading nook:


Step One - Learning and Planning
Educating myself: 
I bought a few books regarding attic renovation, framing, drywall handing etc. All on EBAY. I read them all until I felt comfortable enough ti start the actual work. I tried also so consult with contractors I knew and Home improvement mega stores (no names) employees but most of them just tried go get me to give up the project. All said to me that it is to much for one un-professional woman to do. Well ..... I did not listen to them. 
Establishing a Plan:


What do I have:
An attic with high ceiling (at the highest point about 12 ft high), a red brick chimney runs in the middle of the room, new roof, insulation, three new windows and one old one, old wood floor, no AC, one electric outlet and one light. The stairs to the attic are stable and wide. And one curios family cat that hangs around the attic all day. I started a attic ideas folder and put there magazines clippings etc.


What do I want:
Then I made a plan of what I want. Since the attic was big, about 300 sf, my dream plan included an open plan attic with an enclosed bathroom that includes toilet, sink and shower. The plan was to have a space that can be a master bedroom or kids room/rooms. The attic also needed AC and more lights and electric outlets. Also - I did not want to lose the storage space that we had there.

And now to reality.


In order to built a bathroom the floor needs to be checked by an engineer to establish whether it can carry the load. Since at this point I did not want to spend money on that - I decided to cut the project to smaller ones and do them one by one.
Project Attic "To Do" Plan:   
1. Clean the attic and put all that we store there in the eves. Make a list of what is stored where.
2. Cover the storage with plastic for protection.
3. Stud the walls. Add studs to the ceiling.
4. Build built-in book shelves in two of the walls.
5. Drywall the walls and ceiling.
6. Trim the storage openings and windows.
7. Add electric outlets and lights.
8. Paint.
9. Add a banister to the stairs.
10. Do something with the chimney. 
11. Address floor covering.

And that's all.

At this point I was overwhelmed............... So I read some more............. And started to work.